It's been 2 weeks since my last post. I was busy with taking care of my mum who had a knee replacement operation. She is recovering well and resting at home. Thank you to family and friends for their prayers and well wishes.
The weather in Singapore for the past few weeks has unbearably hot. Something cold and sweet is heaven on a hot day. I have always wanted to make my own ice-cream but most recipes without ice-cream makers require beating the ice-cream base 2 - 3 times. I tried that and found it too troublesome for some ice-cream. I saw the recipe by chance online which only requires 2 ingredients and thought I must give it a try.
I decided to make a Cherry Garcia version as that's a favourite since I was introduced to Ben & Jerry's a decade ago and also a Yuzu version as I can't get them from the supermakets.
Homemade Ice-cream (makes about 1.5litres)
Ice-cream base:
2 cups heavy/whipping cream
1 can of condensed milk (400g)
1 tsp vanilla extract
Cherry Garcia:
1/2 cup pitted cherries (fresh/frozen)
1/2 cup good quality dark chocolate
Yuzu:
4 tsp yuzu juice
2 tbsp yuzu tea/jam
1) Refrigerate the whipping cream, condensed milk and your mixing bowl overnight to ensure that they are really cold.
2) Whip the whipping cream using a cake mixer till soft peaks and then add in the condensed milk and vanilla extract. Continue whipping to firm peaks. This is your ice-cream base.
3) Divide the ice-cream base into 2 bowls. In one, fold in the cherries and dark chocolate chunks. In the other, fold in the Yuzu juice and jam.
4) Transfer the ice-cream into containers and freeze overnight or at least 6 hours before serving.
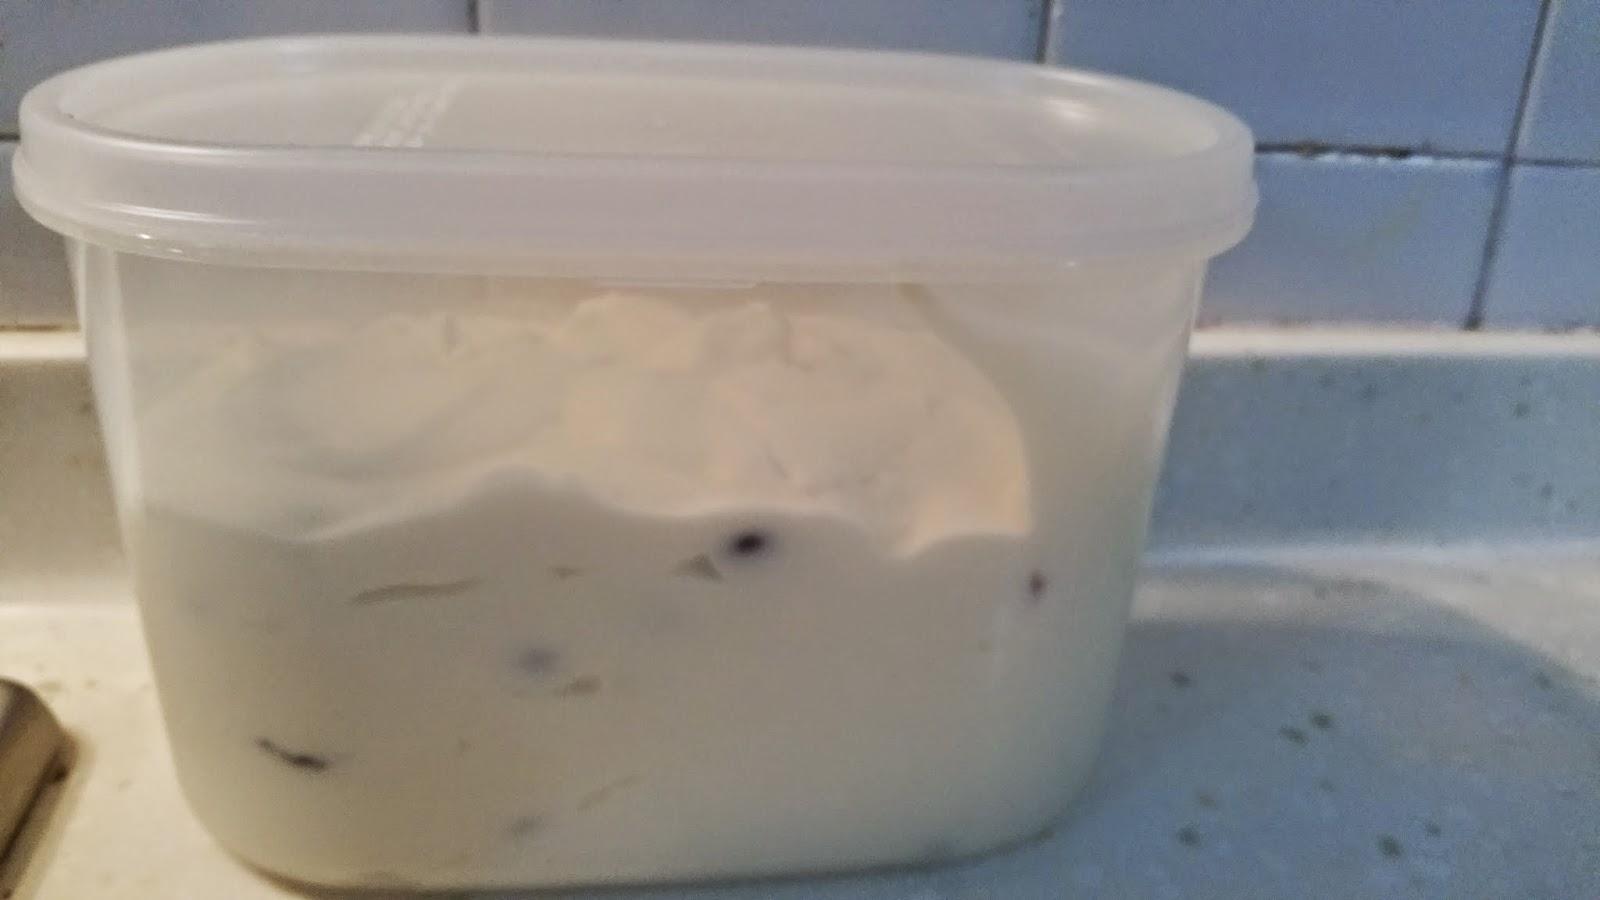
Please pardon the poor lighting in the photos as I made the ice-cream late in the evening. I couldn't wait to try the ice-cream. Had to scoop some out to take the first photo the next day and couldn't resist licking the scoop :)
The verdict? My sis and bro-in-law loved the Cherry Garcia ice-cream (also one of their favourite flavours) but they thought I put in too much chocolate chunks. I have adjusted the chocolate quantity for the recipe above. Originally I had a cup of chocolate in there as I am a big dark chocolate lover.
My mum was wondering why 2nd ice cream is citrus in taste and I had to explain it's Yuzu.
I am looking forward to try new flavours once these 2 tubs are finished. I have left them at my mum's so that we can all share the calories :)
Showing posts with label Chocolate. Show all posts
Monday, 25 May 2015
Monday, 9 March 2015
Easter desserts week 1: Red Velvet Easter Cupcakes
After 2 weeks of celebration and feasting, the Lunar New Year come to a close last week. However, I seem to have celebrations to attend post Lunar New Year! A few friends have moved into new homes in the past 2-3 months and I have attended 2 house-warming celebrations during the last 2 Sundays. Since I am baker, I have baked a cake for each of the celebration using the giant cupcake mould gift that I received last Christmas. I have chosen the favourite colours of the hostess for each cake. The colours reminds me of Spring! I was amazed at how lovely the cakes turn out.
The giant cupcakes were baked and frosted using the Red Velvet cupcake recipe that I am sharing with you today. Each recipe makes about 14 cupcakes and you will need 1.5 recipes for the giant cupcake. I used 2 recipes for the giant cupcake and usually have enough batter for about 6 cupcakes. As Easter is coming, I have decided to make some Easter themed cupcakes. The children at the party were rushing for these 6 cupcakes!
Red Velvet Cupcakes (Makes 14 cupcakes)
Cupcakes:
Red Velvet Cupcakes (Makes 14 cupcakes)
Cupcakes:
250g self-raising flour
½ teaspoon
baking soda
100g soft unsalted butter
180g caster sugar
2 tsp vanilla extract
2 large eggs
175 ml milk
1 tbsp + 1 tsp apple cider vinegar
1 tbsp red food colouring
4 tbsp cocoa powder
1. Preheat
the oven to 180°C and prepare cupcake cases.
2. Mix 1
tablespoon of cider vinegar into the milk and let it stand for 5 minutes.
3. Sieve the self-rising flour, cocoa powder and baking soda together in a bowl.
4. In
another bowl, cream the butter and sugar, till a soft, pale mixture forms. Beat
in the vanilla extract.
5. Into
the mixture, fold 1 spoonful of the dry ingredients, then 1 egg, followed by
some more dry ingredients, then the other egg, followed by the rest of the dry
ingredients.
6. Mix in
the additional 1 teaspoon of cider vinegar into the milk and pour in the milk
mixture into the batter. Mix well and divide the batter into the 14 cases. Bake in the oven for about 18 - 20 minutes.
7. Leave
them to cool before frosting or storing.
Cream Cheese frosting and decorating:
250g cream cheese
125g butter
½ - 1 cup icing sugar (to your taste)
1 tsp vanilla extract
1 tsp apple cider vinegar
Green Food colouring
Piping bag fitted with Wilton #233 piping tip
Chocolate eggs (I used peanut M&Ms)
1. Leave
the cream cheese and butter to soften at room temperature for about 30 minutes.
2. Beat
the cream cheese and butter together in a mixer till smooth.
3. Add
the icing sugar and vanilla essence to the mixture and beat till smooth.
4. Mix in
the food colouring a little at a time till desired colour is
achieved.
5. Fill a piping bag with the frosting and pipe all over the cupcake.
6. Chill the cupcakes and put 3 peanut M&Ms on each cupcake before serving.
Note: Do not put the M&Ms into fridge as the condensation will cause dis-colouration.
You can involve the children in piping the frosting and placing the chocolate eggs. Happy Spring!
Tuesday, 27 January 2015
Bangkok trip part 2 and Heart shaped Nutella rolls
Continuing on my Bangkok trip, we went to Chinatown and Terminal 21 on the 2nd day. Usually I don't drop by Chinatown as the traffic jam is quite bad and there is no direct BTS. 6 years ago, a friend working in Bangkok showed me another way to get to Chinatown. Since my mum is with me for this trip, I thought I would attempt to use this route to Chinatown. When we arrived at the Central pier (Saphan Taksin BTS station), I wasn't too sure which boat to take and ended up following all the tourist by taking the 40 bhat per trip tourist ferry and alighted at Pier 5. We exited the pier and walked along the main road and saw the accessories wholesale market which I visited 6 years back. There were so many varieties of necklace, earrings and rings that I had a hard time choosing them.
After making my purchases, we walked along the shops and came across other wholesale shops selling ribbons, party decorations, toys, bags, kitchenware, etc. I bought very pretty foldable luggage bags, recycle grocery bags, aprons, bath towel and bath sponge.
As it was nearing lunchtime, we exited the wholesale market and walked towards the main road, Yarowat. Mum was very happy to see dried food stalls and fruit stalls. She bought 1 kg of cashew nuts and 2 guavas. I had to stop her from buying more as I was worried about the load. There were numerous roadside food stalls and we even saw Chwee Kueh, Thai style.
We found a nice restaurant across the road and had a good lunch of roast duck, claypot glass noodles with prawns and spinach. The roast duck in Bangkok is moist and tender and I love the chilli sauce they have to go with the duck. I was very tempted to order another serving but restrained myself.
On our way back to the pier, we came across a traditional Teochew pastry shop. There were many local Chinese ladies there buying the pastries. It was very nostalgic to see many traditional pastries.
That evening, I brought Mum to Terminal 21 as she hasn't been there before. She was impressed with the travel theme of the mall. We tried a new restaurant, Reflections and I finally had my steamed fish with lime and chilli and my curry crab!
Look out for my next post on my last day in Bangkok.
Today I decided to bake Nutella bread as I had a bottle of Nutella expiring this weekend. I tried the recipe that was posted on Everyone eats well in Flanders but decided to shape the bread similar to Cinnamon rolls. This is the 2nd time I tried the recipe. I spread too much Nutella the first time round in bid to finish the Nutella and the buns were pretty greasy. Since Valentine's day is round the corner, I used my heart-shaped Chiffon pan today for the rolls.
Heart-shaped Nutella rolls (recipe adapted from here)
450g bread flour
70g sugar
2 eggs yolks
2 tsp instant yeast
250ml warm milk
30g unsalted butter
a pinch of salt
6 tbsp Nutella
1) Put all the ingredients (except Nutella) into a mixing bowl. Using a dough hook, mix all the ingredients till it forms a dough.
2) Continue beating for about 10 minutes till the dough becomes elastic and non-sticky.
3) Remove the dough, grease the mixing bowl and return the dough to the bowl. Cover with a damp cloth and allow the dough to prove in a warm place till double in size. (I switched on the oven to 60 deg C and left the mixing bowl on the door of the oven to shorten the time).
4) When the dough has risen to twice the size, punch out the air and let it proof it again in a warm place. (It took 45 mins to double in size)
5) Divide the dough into 3 portion so that it's easier to handle.
6) Flour the work area and roll out 1 portion of the dough into a rectangle.
7) Spread 2 tbsp of Nutella on the dough and roll the dough up like a swiss roll. Using a pastry cutter, cut the roll into 2 inch size and place them on a greased heart-shape pan (or any other pan of your choice). Remember to leave space between the cut rolls as they will expand.
8) Pre-heat the oven at 180 deg C. Leave the rolls to proof for another 20 mins in a warm place. Brush on some egg whites to glaze the buns.
9) Bake them at 180 deg C for 20 mins till golden brown.
10) Cool for 10 minutes before removing from pan.
Note: I used 2 portions of dough for my 21 cm heart-shaped pan and put the 3rd portion into a 16cm chiffon pan.
I love the texture of the bread. Its soft and fluffy and goes very well with coffee or tea. Do bake them for your love ones this Valentine's Day.
I am submitting this post to "My Treasured Recipes #5 - Chinese New Year Goodies (Jan/Feb)" hosted my Miss B of Everyone Eats Well in Flanders and co-hosted by Charmaine of Mimi Bakery House
After making my purchases, we walked along the shops and came across other wholesale shops selling ribbons, party decorations, toys, bags, kitchenware, etc. I bought very pretty foldable luggage bags, recycle grocery bags, aprons, bath towel and bath sponge.
As it was nearing lunchtime, we exited the wholesale market and walked towards the main road, Yarowat. Mum was very happy to see dried food stalls and fruit stalls. She bought 1 kg of cashew nuts and 2 guavas. I had to stop her from buying more as I was worried about the load. There were numerous roadside food stalls and we even saw Chwee Kueh, Thai style.
We found a nice restaurant across the road and had a good lunch of roast duck, claypot glass noodles with prawns and spinach. The roast duck in Bangkok is moist and tender and I love the chilli sauce they have to go with the duck. I was very tempted to order another serving but restrained myself.
On our way back to the pier, we came across a traditional Teochew pastry shop. There were many local Chinese ladies there buying the pastries. It was very nostalgic to see many traditional pastries.
That evening, I brought Mum to Terminal 21 as she hasn't been there before. She was impressed with the travel theme of the mall. We tried a new restaurant, Reflections and I finally had my steamed fish with lime and chilli and my curry crab!
Look out for my next post on my last day in Bangkok.
Today I decided to bake Nutella bread as I had a bottle of Nutella expiring this weekend. I tried the recipe that was posted on Everyone eats well in Flanders but decided to shape the bread similar to Cinnamon rolls. This is the 2nd time I tried the recipe. I spread too much Nutella the first time round in bid to finish the Nutella and the buns were pretty greasy. Since Valentine's day is round the corner, I used my heart-shaped Chiffon pan today for the rolls.
Heart-shaped Nutella rolls (recipe adapted from here)
450g bread flour
70g sugar
2 eggs yolks
2 tsp instant yeast
250ml warm milk
30g unsalted butter
a pinch of salt
6 tbsp Nutella
1) Put all the ingredients (except Nutella) into a mixing bowl. Using a dough hook, mix all the ingredients till it forms a dough.
2) Continue beating for about 10 minutes till the dough becomes elastic and non-sticky.
3) Remove the dough, grease the mixing bowl and return the dough to the bowl. Cover with a damp cloth and allow the dough to prove in a warm place till double in size. (I switched on the oven to 60 deg C and left the mixing bowl on the door of the oven to shorten the time).
4) When the dough has risen to twice the size, punch out the air and let it proof it again in a warm place. (It took 45 mins to double in size)
5) Divide the dough into 3 portion so that it's easier to handle.
6) Flour the work area and roll out 1 portion of the dough into a rectangle.
7) Spread 2 tbsp of Nutella on the dough and roll the dough up like a swiss roll. Using a pastry cutter, cut the roll into 2 inch size and place them on a greased heart-shape pan (or any other pan of your choice). Remember to leave space between the cut rolls as they will expand.
9) Bake them at 180 deg C for 20 mins till golden brown.
10) Cool for 10 minutes before removing from pan.
Note: I used 2 portions of dough for my 21 cm heart-shaped pan and put the 3rd portion into a 16cm chiffon pan.
I love the texture of the bread. Its soft and fluffy and goes very well with coffee or tea. Do bake them for your love ones this Valentine's Day.
I am submitting this post to "My Treasured Recipes #5 - Chinese New Year Goodies (Jan/Feb)" hosted my Miss B of Everyone Eats Well in Flanders and co-hosted by Charmaine of Mimi Bakery House
Wednesday, 27 August 2014
Easy Nutella Brownies
Met 2 of my classmates from the university days on Monday for a catch-up. These days we probably meet about once or twice a year as everyone is busy with work and family. Both friends have young children so one of their activities together is baking. One of the reasons for our catch-up is so that I can bring one of my friends to buy the ingredients for making snow skin mooncakes together with her boys. The other friend commented that her little girl loves going to ToTT (a kitchen supply store in Singapore) and baking cookies there. I told her she could do simple things like cookies and cupcakes at home with her girl so that it less expensive and they do not need to drive out. Afterall, she has a domestic helper who can help with the clean-up.
On Monday afternoon, when I got home, I sent the recipe for this easy 3 ingredient brownies to them. I thought I would share this recipe with you too. These brownies look so pretty in their cupcake liners.
Nutella Brownies in a cup
1 cup Nutella (about 280g)
2 Eggs
10 tbsp plain Flour
some nuts for decoration (optional)
1. Pre-heat oven at 170 deg C
2. Whisk the eggs lightly with a fork.
3. Add in the Nutella and mix well.
4. Sieve the plain flour and fold into the egg and Nutella mixture.
5. Scoop them into cupcake liners or muffin moulds.
6. Bake for 15-20 minutes till cooked (depends on size of cups)
I have added some almond flakes for decoration. You can add hazelnuts or walnuts if you like. The brownies can also be baked in a try and then sliced for serving. The baking time will take about 30-40 minutes.
I served my brownies with some vanilla ice-cream when I had some guests over. Pardon the poor lighting, I took the picture in the evening just prior to eating my brownie.
This recipe is so easy to make yet very yummy! The most difficult part is trying to measure the sticky Nutella in a cup and transferring into the mixing bowl. I solved this by adding the Nutella directly into the mixing bowl and weighing it.
On Monday afternoon, when I got home, I sent the recipe for this easy 3 ingredient brownies to them. I thought I would share this recipe with you too. These brownies look so pretty in their cupcake liners.
Nutella Brownies in a cup
1 cup Nutella (about 280g)
2 Eggs
10 tbsp plain Flour
some nuts for decoration (optional)
1. Pre-heat oven at 170 deg C
2. Whisk the eggs lightly with a fork.
3. Add in the Nutella and mix well.
4. Sieve the plain flour and fold into the egg and Nutella mixture.
5. Scoop them into cupcake liners or muffin moulds.
6. Bake for 15-20 minutes till cooked (depends on size of cups)
I have added some almond flakes for decoration. You can add hazelnuts or walnuts if you like. The brownies can also be baked in a try and then sliced for serving. The baking time will take about 30-40 minutes.
I served my brownies with some vanilla ice-cream when I had some guests over. Pardon the poor lighting, I took the picture in the evening just prior to eating my brownie.
This recipe is so easy to make yet very yummy! The most difficult part is trying to measure the sticky Nutella in a cup and transferring into the mixing bowl. I solved this by adding the Nutella directly into the mixing bowl and weighing it.
Wednesday, 6 August 2014
Magic Custard Cake (2) - Chocolate Orange Magic Custard Cake
Continuing on my exploration of the magic custard cake recipes.... I came across this recipe the next day after baking my first magic custard cake which uses Chocolate and Cointreau! As mentioned in my earlier post, I absolutely love the combination of both Chocolate and Orange. This recipes uses orange liqueur to boot! I couldn't wait to try this recipe... and made my friend, K try the recipe while she was over at my place that afternoon.
I used a 7" square pan this time as I like a taller cake. Look at how magnificent the cake rose as compared to the Lemon one in my previous post. The different layers and textures are also more obvious in this cake.
The recipe is from www.thenoshingbride.com with some modification.
Chocolate Orange Magic Custard Cake
113g unsalted Butter
600ml Milk
1 cup plain Flour
0.5 cup Cocoa powder
4 large Eggs
1 tbsp caster Sugar
1.5 cups icing sugar
4 tbsp Cointreau (replace with orange juice and orange zest for non-alcoholic version)
1/2 tsp vanilla essence
1. Preheat the oven to 160 deg C and line a 7 inch square pan
2. Heat the milk to lukewarm and set aside.
3. Melt the butter and set aside
4. Separate the eggs into 2 mixing bowls. Hand whisk the egg yolks together with the icing sugar till thick and pale yellow.
5. Add the melted butter into the egg yolk and icing sugar mixture and mix well. Ensure the melted butter is not too hot to cook the yolks.
6. Sieve the plain flour and add to the egg yolk mixture.
7. Add the lukewarm milk and the Cointreau to the egg yolk mixture and mix well.
8. Beat the egg whites with the caster sugar till stiff.
9. Fold in the stiff egg white into the egg yolk mixture. The batter will be difficult to fold and lumpy. Try to fold in and minimise any egg white lumps.
10. Pour batter into the cake tray and bake for 45-60 mins. The cake will still have a slight jiggle when done.
11. Leave to cool before un-moulding the cake. Best to chill before cutting and serving the cake.
I have used another of my new stencils to decorate the cake with snow powder (cocoa powder will not be obvious against the colour of the cake).
I love this cake very much and you can really taste the Cointreau in the cake. Brought some to church the next morning and my friends were commenting it's too early for alcohol :P
K and I love the cake so much that we made a non-alcoholic version with orange juice a few days later. The cake was sold out within 3 hours in K's cafe.
I used a 7" square pan this time as I like a taller cake. Look at how magnificent the cake rose as compared to the Lemon one in my previous post. The different layers and textures are also more obvious in this cake.
The recipe is from www.thenoshingbride.com with some modification.
113g unsalted Butter
600ml Milk
1 cup plain Flour
0.5 cup Cocoa powder
4 large Eggs
1 tbsp caster Sugar
1.5 cups icing sugar
4 tbsp Cointreau (replace with orange juice and orange zest for non-alcoholic version)
1/2 tsp vanilla essence
1. Preheat the oven to 160 deg C and line a 7 inch square pan
2. Heat the milk to lukewarm and set aside.
3. Melt the butter and set aside
4. Separate the eggs into 2 mixing bowls. Hand whisk the egg yolks together with the icing sugar till thick and pale yellow.
5. Add the melted butter into the egg yolk and icing sugar mixture and mix well. Ensure the melted butter is not too hot to cook the yolks.
6. Sieve the plain flour and add to the egg yolk mixture.
7. Add the lukewarm milk and the Cointreau to the egg yolk mixture and mix well.
8. Beat the egg whites with the caster sugar till stiff.
9. Fold in the stiff egg white into the egg yolk mixture. The batter will be difficult to fold and lumpy. Try to fold in and minimise any egg white lumps.
11. Leave to cool before un-moulding the cake. Best to chill before cutting and serving the cake.
I have used another of my new stencils to decorate the cake with snow powder (cocoa powder will not be obvious against the colour of the cake).
I love this cake very much and you can really taste the Cointreau in the cake. Brought some to church the next morning and my friends were commenting it's too early for alcohol :P
K and I love the cake so much that we made a non-alcoholic version with orange juice a few days later. The cake was sold out within 3 hours in K's cafe.
Thursday, 17 July 2014
Schokoladen-Brote: Chocolate Crackle Cookies
I was away over the weekend visiting a friend and exploring a different side of Penang. We had a good time looking for the murals and eating our way around. Finally bought my cake stand for RM29.90! It was such a steal! Many thanks to my host for driving me to the 2nd Tesco to get the stand (it sold out when I finally made up my mind to buy). I wanted to buy the cupcake stand too but thought better of it. I will post a picture of the stand when I bake a cake to display :)
I was in Penang when the World Cup finals were played. We were way too tired after the whole day of walking to stay up to watch the game but there were fireworks going on at 4 plus in the morning when Germany won. Congratulations to Germany! As promised to my friend, Ben, I would post a German recipe when Germany wins.
I got the below recipe from my German boss when I was working for a bank. She actually gave me a photocopy of the recipe which is in German and only translated the ingredients in English so I have to guess the method myself.
Chocolate Crackle Cookies
200g dark Chocolate
90g Butter
115g caster Sugar
3 Eggs
1 tsp Vanilla essence
215g all purpose Flour
25g Cocoa powder
1/2 tsp Baking powder
A pinch of Salt
175g icing sugar
1) Pre-heat the oven at 160 deg C
2) Melt chocolate and butter together using a double boiler method
3) Remove the melted chocolate and butter from heat, add the caster sugar and stir till melted.
4) Add the eggs one at a time, stiring till well mixed
5) Add vanilla essence.
6) Sieve the flour, cocoa powder,salt and baking powder together.
7) Add the sieved flour into the melted chocolate mixture.
8) Chill in the fridge for an hour.
9) Shape the cookie dough into small balls. Coat the cookie balls with icing sugar.
10) Bake the cookies for 10-15 minutes. Cool before storing.
I was in Penang when the World Cup finals were played. We were way too tired after the whole day of walking to stay up to watch the game but there were fireworks going on at 4 plus in the morning when Germany won. Congratulations to Germany! As promised to my friend, Ben, I would post a German recipe when Germany wins.
I got the below recipe from my German boss when I was working for a bank. She actually gave me a photocopy of the recipe which is in German and only translated the ingredients in English so I have to guess the method myself.
Chocolate Crackle Cookies
200g dark Chocolate
90g Butter
115g caster Sugar
3 Eggs
1 tsp Vanilla essence
215g all purpose Flour
25g Cocoa powder
1/2 tsp Baking powder
A pinch of Salt
175g icing sugar
1) Pre-heat the oven at 160 deg C
2) Melt chocolate and butter together using a double boiler method
3) Remove the melted chocolate and butter from heat, add the caster sugar and stir till melted.
4) Add the eggs one at a time, stiring till well mixed
5) Add vanilla essence.
6) Sieve the flour, cocoa powder,salt and baking powder together.
7) Add the sieved flour into the melted chocolate mixture.
8) Chill in the fridge for an hour.
9) Shape the cookie dough into small balls. Coat the cookie balls with icing sugar.
10) Bake the cookies for 10-15 minutes. Cool before storing.
Saturday, 5 July 2014
Chocolate Orange Cake
I love chocolate and I love orange!
My closest friends know that I love anything citrus. I have shower gels, lotions, perfumes and room diffuser all in orange scent. I find the scent very refreshing and uplifting and wonderful as a wake me up when you shower with orange scented shower gels. When Baileys came out with the limited edition Orange Truffle Baileys, I had to stock up a few bottles at home!
As for Chocolates, hmmmm... need I say more? Just look at the name of this blog :) So when I came across several blogs mentioning Nigella's Chocolate Orange Loaf Cake, I just had to give it a try. When I first tried this recipe, I found that the orange taste was much stronger than the chocolate. That wasn't the taste I was looking for. I did some modifications and managed to achieve the Chocolate Orange taste that I love. I even baked an Owl cake for my sister's birthday with this same cake.
Chocolate Orange Cake
320g unsalted Butter
4 tbsp Honey
140g Brown sugar
200g Cake flour
86g Cocoa powder
1 tsp Baking soda
4 large Eggs
Zest of 1 large orange
120g orange juice
1) Preheat your oven at 160 deg C
2) Beat the soften butter with honey and brown sugar till smooth.
3) Sieve the cake flour, cocoa powder and baking soda together
4) Fold in one scoop of the flour into the butter mixture and followed by one egg. Continue till you have folded in all the flour and eggs.
5) Add the orange zest and orange juice into batter and mix well.
6) Pour the batter into a 7 inch sqaure pan and bake for 45-55 mins.
You can eat this on its own or you can decorate it with some chocolate ganache.
My closest friends know that I love anything citrus. I have shower gels, lotions, perfumes and room diffuser all in orange scent. I find the scent very refreshing and uplifting and wonderful as a wake me up when you shower with orange scented shower gels. When Baileys came out with the limited edition Orange Truffle Baileys, I had to stock up a few bottles at home!
As for Chocolates, hmmmm... need I say more? Just look at the name of this blog :) So when I came across several blogs mentioning Nigella's Chocolate Orange Loaf Cake, I just had to give it a try. When I first tried this recipe, I found that the orange taste was much stronger than the chocolate. That wasn't the taste I was looking for. I did some modifications and managed to achieve the Chocolate Orange taste that I love. I even baked an Owl cake for my sister's birthday with this same cake.
Chocolate Orange Cake
320g unsalted Butter
4 tbsp Honey
140g Brown sugar
200g Cake flour
86g Cocoa powder
1 tsp Baking soda
4 large Eggs
Zest of 1 large orange
120g orange juice
1) Preheat your oven at 160 deg C
2) Beat the soften butter with honey and brown sugar till smooth.
3) Sieve the cake flour, cocoa powder and baking soda together
4) Fold in one scoop of the flour into the butter mixture and followed by one egg. Continue till you have folded in all the flour and eggs.
5) Add the orange zest and orange juice into batter and mix well.
6) Pour the batter into a 7 inch sqaure pan and bake for 45-55 mins.
You can eat this on its own or you can decorate it with some chocolate ganache.
Friday, 4 July 2014
1st Blog: Guinness Chocolate Cake
Hello everyone
This is the first time I am writing a blog. I love cooking and baking and have always posted photos of my dishes and cakes on Facebook. A friend have asked me several times if I have a blog as she would love to replicate some of the recipes but I have always been too busy to start blogging. Since I am currently on a career sabbatical and trying out new recipes very often, I thought I will give this a try. Char, this is for you :)
I am starting my first blog with a decadent cake: Guinness Chocolate Cake by Nigella Lawson (with some modifications). I love Nigella's recipes and was introduced to her by a close friend in 2010. I have tried this recipe once last year for a baking contest in the office and the judges love the combination. The cake is moist and the taste of Guinness is not very obvious. I would probably try making a Guinness buttercream to go with the cake next time to increase the taste of Guinness.
Guinness Chocolate Cake
1 can Guinness Stout (320ml can)
250g Butter
45g Cocoa powder
80ml Yoghurt
100g Brown sugar
50g Caster sugar
2 large Eggs
1/2 tbsp Vanilla essence
275g Plain flour
2 1/2 tsp baking soda
1) Pre-heat the oven at 180 deg C
2) Melt the butter and Guinness Stout together on low fire.
3) Remove from the above mixture from heat, whisk in both types of sugar and cocoa powder. Set aside.
4) Beat the yoghurt, eggs and vanilla essence together using a hand whisk.
5) Add the yoghurt mixture into the Guinness mixture and mix well.
6) Sieve the flour together with baking soda.
7) Add the sieved flour into the Guinness mixture and mix till smooth.
8) Pour the batter into a greased and lined cake tin
9) Bake for 45mins - 55 mins
I have used a bundt pan this time and have drizzled some Dulce de Leche over the cake.
Hope you enjoy this cake like I have.
Update: The Guinness taste is much stronger after 2 days. So patience, patience, patience. Look at how moist the cake is! For this slice, I have spread on some leftover chocolate frosting! Double chocolate!
This is the first time I am writing a blog. I love cooking and baking and have always posted photos of my dishes and cakes on Facebook. A friend have asked me several times if I have a blog as she would love to replicate some of the recipes but I have always been too busy to start blogging. Since I am currently on a career sabbatical and trying out new recipes very often, I thought I will give this a try. Char, this is for you :)
I am starting my first blog with a decadent cake: Guinness Chocolate Cake by Nigella Lawson (with some modifications). I love Nigella's recipes and was introduced to her by a close friend in 2010. I have tried this recipe once last year for a baking contest in the office and the judges love the combination. The cake is moist and the taste of Guinness is not very obvious. I would probably try making a Guinness buttercream to go with the cake next time to increase the taste of Guinness.
Guinness Chocolate Cake
1 can Guinness Stout (320ml can)
250g Butter
45g Cocoa powder
80ml Yoghurt
100g Brown sugar
50g Caster sugar
2 large Eggs
1/2 tbsp Vanilla essence
275g Plain flour
2 1/2 tsp baking soda
1) Pre-heat the oven at 180 deg C
2) Melt the butter and Guinness Stout together on low fire.
3) Remove from the above mixture from heat, whisk in both types of sugar and cocoa powder. Set aside.
4) Beat the yoghurt, eggs and vanilla essence together using a hand whisk.
5) Add the yoghurt mixture into the Guinness mixture and mix well.
6) Sieve the flour together with baking soda.
7) Add the sieved flour into the Guinness mixture and mix till smooth.
8) Pour the batter into a greased and lined cake tin
9) Bake for 45mins - 55 mins
I have used a bundt pan this time and have drizzled some Dulce de Leche over the cake.
Hope you enjoy this cake like I have.
Update: The Guinness taste is much stronger after 2 days. So patience, patience, patience. Look at how moist the cake is! For this slice, I have spread on some leftover chocolate frosting! Double chocolate!
Subscribe to:
Posts (Atom)